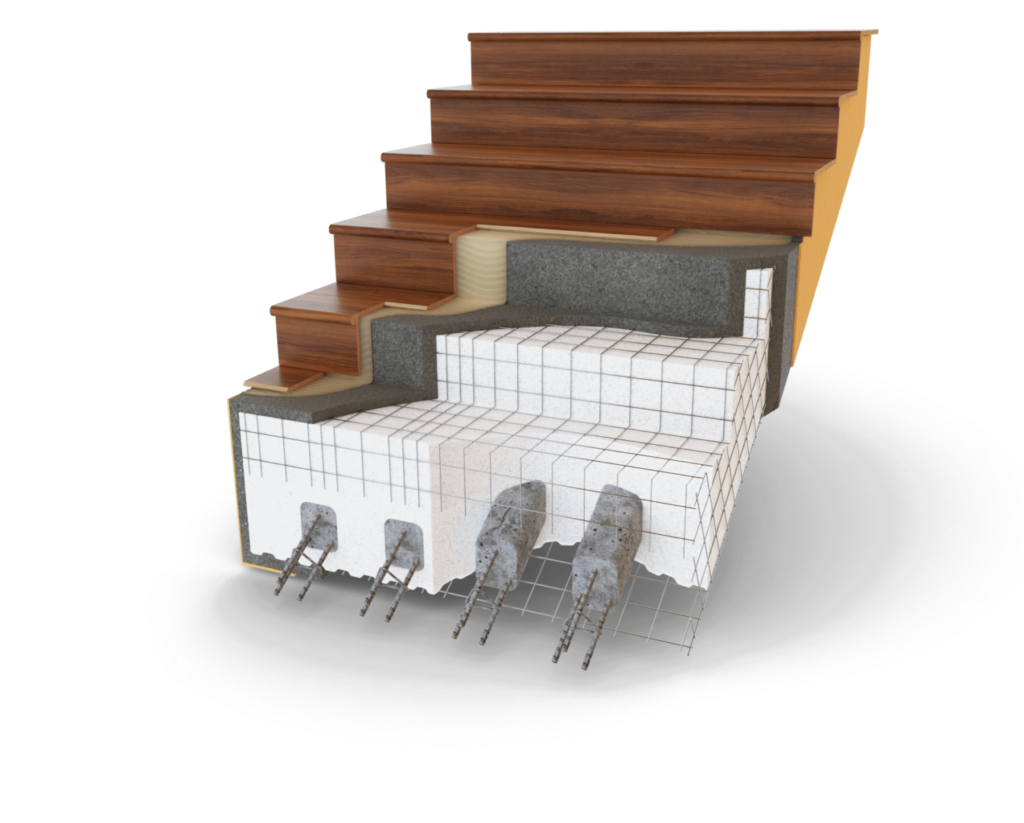
Building Better Homes, Our Construction Services Tailored to Your Needs.
OUR PROCESS
STEP 1
INSTALLATION OF REBAR ANCHORS
Anchor bars can be inserted prior to pouring the foundation or drilled into position after the foundation has set.
STEP 2
INSTALLATION OF PANEL
Due to their lightweight nature, a single operator can effortlessly lift and position the panels wherever needed.
STEP 3
POST INSTALLATION
Right after the panels are placed, the walls’ perfect linearity and verticality are promptly checked and ensured.
STEP 4
FLOOR PANEL INSTALLATION
After the floor panels are positioned, supported both by the walls and from below, any required additional steel reinforcement is installed, followed by the pouring of concrete.
STEP 5
ELECTRICAL AND PLUMBING
A hot-air gun or torch is employed to carve channels in the polystyrene, facilitating the placement of switch boxes, electrical conduits, cables, pipes, and other components.
STEP 6
APPLICATION OF SHOTCRETE
Both sides of the walls of the Single Panel are coated with shotcrete and then finished with plaster.
STEP 7
Apply finishes.
The final appearance of the product can vary greatly, offering numerous styles. The system’s versatility permits non-traditional designs that incorporate more curves and larger overhangs.
Are you ready for a better way to build?
Arrange a complimentary consultation with a SIMS SCIP System Expert to obtain a personalized project estimate.